

Affordable Large Format Printing Services: 2026 Review
Table of Contents
- What Affordable Large Format Printing Services Should Deliver
- The Real Cost of Large Format Printing: A Practical Cost Calculator
- Best Materials for Outdoor Signage and Indoor Displays
- Custom Tradeshow Banners and Modular Display Options
- File Preparation Best Practices for Print-Ready Files
- Turnaround Time vs Quality: What Affordable Printing Really Means
- How to Get a Custom Quote and Order Online
- Frequently Asked Questions
Last Updated: September 28, 2026
What Affordable Large Format Printing Services Should Deliver
Affordable large format printing services should deliver accurate color, durable materials, and a predictable price. Artsoft Expo Solutions Inc. pairs wide-format output with lightweight, easy-to-assemble display hardware. The trap is shopping on headline price alone.
A genuinely affordable service gets four things right:
- Print quality: high-resolution output with a consistent CMYK color profile
- Material fit: the right substrate for indoor or outdoor use
- Finishing included or clearly priced: grommets, hems, pockets, lamination
- Honest turnaround: a delivery date that holds
The Real Cost of Large Format Printing: A Practical Cost Calculator
Here is the formula:
Total cost = (material rate × width × height) + finishing + rush fees + shipping
Worked example using listed rates:
| Item | Rate | Size | Finishing | Notes |
|---|---|---|---|---|
| 13oz Vinyl Banner | from $3.00 | Any up to 120" wide | Grommet, pocket, hem | Events, fences, retail |
| 18oz Banner Material | from $8.00 | Any up to 120" wide | Hem taped +$1/linear ft | Heavy-duty outdoor use |
| Poster | from $3.00 | Up to 50" wide | None required | Gloss or waterproof synthetic |
| Backlit Poster | from $12.00 | Up to 50" wide | Satin finish | Lightboxes, snap frames |
| 8oz Mesh Banner | from $6.00 | Up to 63" wide | Wind holes, hem | Fences, construction |
| Clear Window Decal | from $16.00 (0.6m) | 0.6m, 0.9m, or 1.2m wide | Gloss or matte lamination | Storefront glass |
| Hoarding Graphics | from $3.50 | Up to 52" per panel | Removable or permanent | Mall and site hoarding |
| Storefront Re-Surface Vinyl | from $8.00/sq ft | Up to 50" wide | Gloss or matte lamination | Sign refresh |
Running the numbers on a real job
Take a 0.6m × 2.4m banner, approximately 1.4 square meters. At $3.00/sq ft (approx. $32.29/sq m), material is $48.00. A stitched hem at $2.00 per linear foot (approx. $6.56/linear m) around 7.3 linear meters is $48.00, plus four grommets at $1.00 each. Subtotal: $96.00.

The hidden line items
Three costs routinely fall outside the material rate:
- Finishing per linear foot. Hem, Velcro, and pole pockets are priced by the running foot, not the square foot. A wide, short banner has more perimeter per square foot, so finishing can exceed material cost on squat formats.
- Minimum order charges. Many shops apply a minimum job value. A single small decal may be quoted at the minimum, not at the per-unit rate.
- Shipping on oversized parcels. Anything over the standard parcel size threshold is priced by dimensional weight and length-plus-girth, not actual weight. A rolled banner in a long tube is almost always an oversized parcel.
A quick decision rule
Before requesting a quote, answer three questions: how long will it hang, will it face wind or direct sun, and how many times will you reuse it? Short life, sheltered, single use, take the lightest material that fits. Long life, exposed, reused, pay for weight and finishing up front. That prevents most overspend and reprints.
Best Materials for Outdoor Signage and Indoor Displays
The best material for outdoor signage resists wind, water, and UV fade; the best for indoor displays maximizes color depth and finish. Matching substrate to environment determines whether your print looks sharp in month six.
- 13oz Vinyl Banner: the workhorse. Light, affordable, fine for short-to-medium outdoor runs and most indoor use.
- 18oz Banner Material: heavy-duty vinyl for long outdoor exposure and repeated handling.
- 8oz Mesh Banner: perforated so wind passes through. Ideal for construction sites, fences, and sports venues.
- Hoarding Graphics: short-term vinyl for mall and construction hoarding, permanent or removable.
For indoor graphics, color and finish lead:
- Poster (Gloss or Synthetic Paper): 9mil gloss for punchy color, 10mil synthetic when you need a waterproof sheet.
- Backlit Poster / Backlit Film: 8mil translucent film that glows evenly in a lightbox or snap frame.
- Clear Window Decals: 3mil transparent vinyl with optional white ink so the graphic reads vividly without blocking daylight.
Vinyl Banners: 13oz vs 18oz for Events and Fences
Choose 13oz for events and short-term display, 18oz for fences and long outdoor exposure. The 13oz is lighter and cheaper to finish, useful when hanging dozens for a single weekend.

Window Decals, Posters, and Backlit Film for Retail
Retail graphics split into three jobs: window promotion, in-store posters, and illuminated displays. Each wants a different substrate.
Custom Tradeshow Banners and Modular Display Options
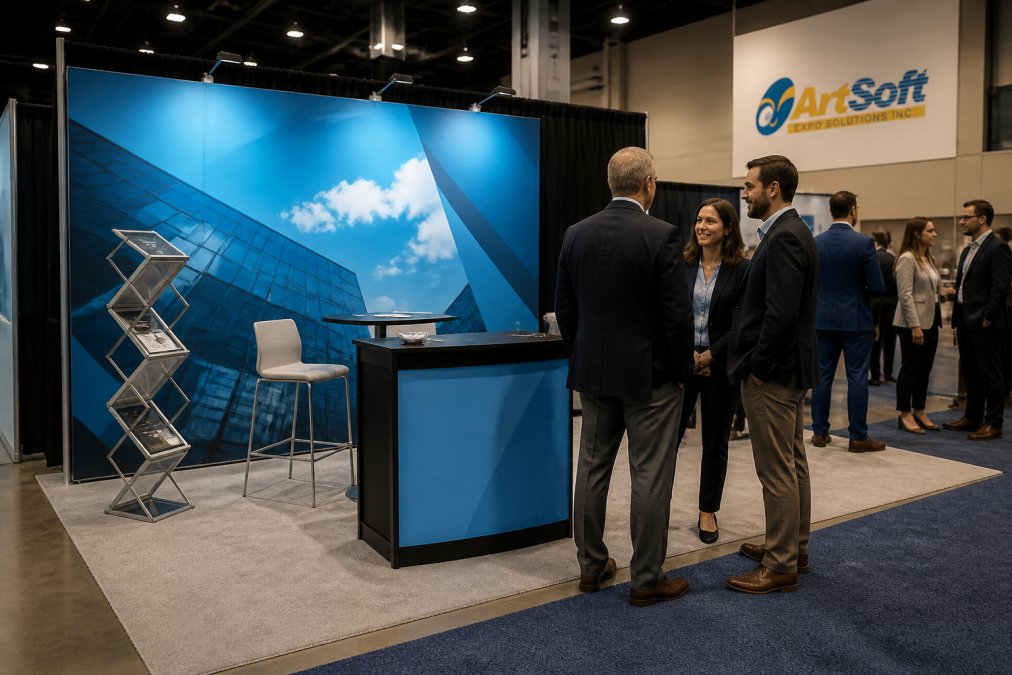
Custom tradeshow banners work best when graphic and hardware are planned together. A banner that looks great flat but sags on a cheap frame underdelivers on the show floor, that is where modular display systems earn their keep.
File Preparation Best Practices for Print-Ready Files
Print-ready files prevent the two most avoidable problems: blurry output and graphics cut off at the edge. Getting this right takes ten minutes and saves a reprint. What most checklists leave out is that the right settings depend on material and finishing, a window decal and a mesh banner do not want the same file.
The universal rules
- Set resolution to 150 dpi at final size. Large format is viewed from a distance, so 150 dpi at full size is sharp; a small file scaled up is not. For close-viewed pieces, window decals, counter posters, backlit film, go to 200-300 dpi at final size.
- Build in CMYK color profile. Convert from RGB before export so printed color matches your proof. Bright RGB greens and oranges are the usual casualties; check them against a CMYK proof before you commit.
- Add bleed and crop marks. Extend background art past the trim line so no white edge appears after cutting. A common working bleed is 0.125-0.25 inch on each side for rigid and sheet goods.
- Outline your fonts. Convert text to paths so a missing font never substitutes on the press.
- Flatten transparencies. Merged layers print predictably across RIP software.
- Embed or supply all images at full size. Never place a low-resolution image and scale it up.
Material-specific adjustments
This is where files fail even when the six rules above are met.

- Vinyl banners with hems or pole pockets. The finishing folds or sews a margin, so keep critical text and logos at least 2 inches from every edge. A pole pocket consumes 2-4 inches of the top and bottom, build that into the artboard.
- Banners with grommets. Grommets punch through the hem at intervals, typically every 12-24 inches. Keep anything you cannot lose at least 2 inches inside the finished edge.
- Mesh banners. The perforated substrate lets background color show through. Avoid fine text under about 1 inch tall and thin hairline strokes, they break up across the holes. High-contrast, bold graphics read best.
- Clear window decals. Decide up front whether you want white ink behind the graphic. Without it, colors are translucent and the view behind shows through; with it, the graphic reads solid. Specify the white-ink layer explicitly in the file or the job sheet.
- Backlit film. Lightboxes push brightness through the print, so colors that look correct on paper can wash out. Expect to dial back density and test a proof if the lightbox is the primary display.
- Rigid substrates (foam board, coroplast). Bleed matters less because there is no fold, but edge trim is visible. Keep a clean margin and avoid art that relies on a precise cut line.
A preflight checklist you can run in five minutes
- File is at final size, not scaled.
- Resolution is 150 dpi minimum at that final size (200-300 for close-viewed).
- Color mode is CMYK, not RGB.
- Bleed extends past the trim on all sides.
- Fonts are outlined or embedded.
- Transparencies are flattened.
- Critical text sits at least 2 inches inside any hemmed, grommeted, or pocketed edge.
- For window decals, the white-ink layer is specified.
- For mesh, no fine text or hairlines below the readable threshold.
Turnaround Time vs Quality: What Affordable Printing Really Means
Affordable printing means paying for the quality level your use case actually needs, not the cheapest quote on the page. Rush fees exist because compressed turnaround forces a shop to reshuffle its production queue. Understanding that trade-off is how you avoid paying for speed you did not need.
Here is how to decide:
- Planned weeks ahead: standard turnaround, best price, no rush fee.
- Needed in days: expect a rush charge; confirm the date in writing.
- Event-critical: order early and build a buffer. A promised date is not a guarantee unless it is confirmed in writing.
How to Get a Custom Quote and Order Online
Getting a custom quote online takes four inputs: size, material, finishing, and quantity. Supply all four and most providers can price the job without a back-and-forth.
The process:
- Measure your space. Confirm width and height, and note any height limits at the venue.
- Pick your material. Match it to indoor or outdoor use and expected lifespan.
- Choose finishing. Grommets, pockets, hems, Velcro, or lamination, priced per linear foot where applicable.
- State your in-hands date. Not the order date, the date the banner must be hanging.
- Upload print-ready files. Reference the checklist above.
- Confirm the quote in writing. Material, finishing, shipping, and delivery date, all itemized.
Frequently Asked Questions
What is the cheapest way to print large format graphics?
For budget-conscious projects, 13oz vinyl banners start at $3.00 and posters start at $3.00 per unit. These materials balance durability and cost for indoor and short-term outdoor use. Ordering multiple pieces at once and choosing standard finishing like grommets or taped hems keeps costs down. Avoid rush fees by planning ahead and confirming file specs before ordering.
How much does it cost to print a large poster or banner?
Pricing depends on material and size. Artsoft Expo Solutions lists 13oz vinyl banners from $3.00, 18oz heavy-duty banners from $8.00, posters from $3.00, backlit film from $12.00, and mesh banners from $6.00. Window decals range from $16.00 for 0.6m wide to $32.00 for 1.2m wide. Request a custom quote for exact project pricing.
What materials are best for outdoor large format banners?
For outdoor use, 18oz vinyl handles wind and weather better than 13oz. Mesh banners at 8oz let air pass through, reducing strain on fences at construction sites or sports venues. Both accept grommets and wind holes. For storefront windows, clear decals with UV ink and optional lamination resist fading. Match the material to exposure length and mounting method.
How do I prepare files for large format printing?
Set your file to CMYK color profile, include 1/8 inch bleed and crop marks, and export at 150 dpi at final size for banners or 300 dpi for close-viewed posters. Convert fonts to outlines and embed images. Double-check dimensions before uploading. Artsoft Expo Solutions Inc. accepts print-ready files and offers guidance if you need help with setup.
Can I get custom tradeshow banners and window graphics from one vendor?
Yes. A single provider can handle tradeshow banners, modular displays, window decals, and storefront vinyl. This avoids split shipping and inconsistent color across materials. Artsoft Expo Solutions Inc. offers a wide variety of print and material options, including 13oz and 18oz banners, mesh banners, window decals, posters, backlit film, and hoarding graphics, so one order covers your booth and retail needs.